
In this guide we will walk you through how to create a business letterhead design in Microsoft Word so you can communicate with a professional letter with all the information your recipient needs to know and reinforces your brand.
What is a Letterhead?
A letterhead is a sheet of paper with a heading at the top that identifies the sender. Most businesses create their letterhead then order them in bulk from a printer, ready to send out at a moment’s notice. You can put the preprinted letterhead through office printer and print your information.
Sometimes, letterheads are a more premium, thicker paper than what you’d normally use in your printer as this gives a more prestigious feel to letters. This guide will teach how to design letterhead in word.

What Should You Include on a Letterhead?
Depending on your business there are different things you’ll need to have on your letterhead.
However, according to The Companies Act, you’ll need at least the following information on every letterhead you send:
- Your business’s name
- Where in the UK your business is registered
- Your registered company number
- The address of your registered office
Social media logo are another great thing to add to your letterhead as most businesses and customers have these.
If you need help with design our Glasgow Graphic Design team can help!
Making Your Letterhead in Word
1. Set up your file
The first step is to open up word and set up your page.
- Open up Microsoft Word and open a new blank document
- Go to View and make sure ‘Print Layout’ is selected
- Go to Insert > Header
- Choose a header style from the options provided

If you want to also add a footer to your letterhead design:
- Go to Insert > Footer
- Choose a footer option
2. Add your logo
Your logo is one of the main aspects of your letterhead design. To add this:
- Make sure you’re adding to your header by double-clicking inside the header
- Go to Design > Image
- Add your logo image file from your computer
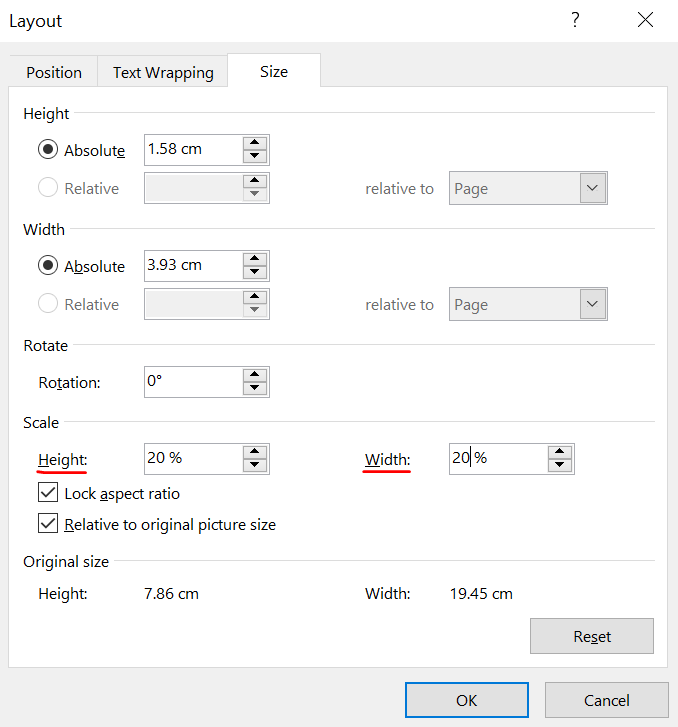
To resize your logo:
- Right-click the image and select Size and Position
- Alter the height and width of your logo under the Size tab
- Click OK when you’re happy with it
3. Add your text
Next, you’ll need to add your important information outlined at the beginning of this guide, like your business’s name. You can add this to either your header or footer.
- Click into your header or footer
- Type your information in
- Highlight the text and choose the font, size and colour under the Home tab
4. Save your design
Once you’re happy with your design, you’ll need to save it in a format that’s suited to printing. Here’s what we recommend:
- Go to File > Save As
- Choose where you want to save your design
- Name your file
- Change the ‘save as type’ box to ‘PDF’

You can upload your artwork as soon as you add your letterheads to your basket. We’ll then run our 10 point check, add bleed and, if necessary, tweak the colours to make sure it prints perfectly. Just to make sure it is perfect for print manufacturing at our Edinbuurgh Printing shop.
And there you have it – a perfectly designed letterhead that’s ready to print! If you have more questions about your letterheads or business stationery, feel free to get in touch with our team as an Edinburgh Printers we’ll be happy to help.
Posted by By Jenny on 5th Jul 2022